|
|
|
Step
1
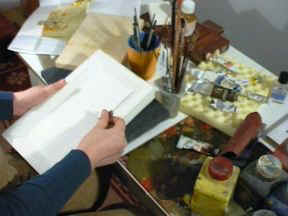 This images illustrate
briefly the main phases of the traditional technique of painting orthodox
religious icons with egg tempera. The icons in the images use wood (which
can be crafted in many custom shapes) as their base, over which, we apply
the canvas initially, using a self-prepared glue. After 12 hours the gesso
is applied in successive layers. The gesso is prepared using the glue, a
white inert material and water. The preparation of the gessos and the
manner in which it's applied is actually the extremely important and it
has consequences on the durability of the finished icon. After drying the
gesso, the surface is smoothed progressively whit agat stone until it
becomes very fine and smooth, with no visible irregularities.
This images illustrate
briefly the main phases of the traditional technique of painting orthodox
religious icons with egg tempera. The icons in the images use wood (which
can be crafted in many custom shapes) as their base, over which, we apply
the canvas initially, using a self-prepared glue. After 12 hours the gesso
is applied in successive layers. The gesso is prepared using the glue, a
white inert material and water. The preparation of the gessos and the
manner in which it's applied is actually the extremely important and it
has consequences on the durability of the finished icon. After drying the
gesso, the surface is smoothed progressively whit agat stone until it
becomes very fine and smooth, with no visible irregularities.
Step
2
A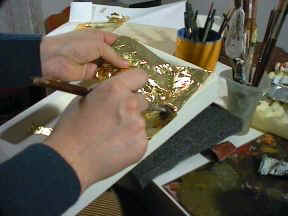 fter
that the contours of the faces are outlined and traced on the gesso.
Shellac is applied in 4 to 6 layers to prepare the support for applying a
main ingredient : the gold leaf. Shellac is used for sealing the surface
and assuring its impermeability necessary for applying the substance used
to glue the golden leaf. After about 12 hours, in which time the surface
became suitably adherent we apply through a special traditional technique,
22kt thin gold leaf, being careful to overlap their margins with each
other. 24 hours have to pass, and then the surface is again smoothed with
great care, removing the excess fragments of leaf, and then a protective
layer is applied to isolate the leaf. This is necessary because the leaf
is very thin and so light that it can fly or glide from the support at
your mere breathing. fter
that the contours of the faces are outlined and traced on the gesso.
Shellac is applied in 4 to 6 layers to prepare the support for applying a
main ingredient : the gold leaf. Shellac is used for sealing the surface
and assuring its impermeability necessary for applying the substance used
to glue the golden leaf. After about 12 hours, in which time the surface
became suitably adherent we apply through a special traditional technique,
22kt thin gold leaf, being careful to overlap their margins with each
other. 24 hours have to pass, and then the surface is again smoothed with
great care, removing the excess fragments of leaf, and then a protective
layer is applied to isolate the leaf. This is necessary because the leaf
is very thin and so light that it can fly or glide from the support at
your mere breathing.
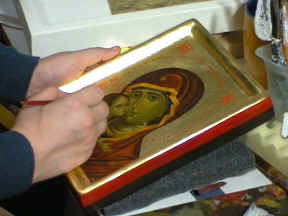
Step 3
 The
colors are prepared using dry pigments, combined with egg emulsion, water
and vinegar. The egg emulsion has the most important role in consolidating
the color and the effects are marvelous, when applying the colors. The
colors have to be applied in thin layers. We begin with the darker tones
passing gradually to the lighter ones (towards the final steps), in the
well outlined spaces of the surface using a mild and very fine paintbrush.
The
colors are prepared using dry pigments, combined with egg emulsion, water
and vinegar. The egg emulsion has the most important role in consolidating
the color and the effects are marvelous, when applying the colors. The
colors have to be applied in thin layers. We begin with the darker tones
passing gradually to the lighter ones (towards the final steps), in the
well outlined spaces of the surface using a mild and very fine paintbrush.
Step 4
 The actual
painting of the clothes comes in then, followed by the hair, faces and
hands, precisely in this order. The fine details of the icon's elements
are leaved for the final phase. We then mould the shapes, in successive
layers, very thin, passing from the darker to the lighter tones. Next
comes the finalizing the details of the faces and clothes.
The actual
painting of the clothes comes in then, followed by the hair, faces and
hands, precisely in this order. The fine details of the icon's elements
are leaved for the final phase. We then mould the shapes, in successive
layers, very thin, passing from the darker to the lighter tones. Next
comes the finalizing the details of the faces and clothes.
Step
5
After
finishing the finer details of the elements, and drying the layers of
paint (this can be as long as several months to get lasting results), the
icon is varnished with a good quality tempera vernis, perhaps more than
once.
|